Vaults allow you to manage and organize files in one place while applying granular Access and Permission settings on a company-to-company basis. Each company you add to a Vault gets a specific link, where you can configure the Access (who from the company can access it) and Permissions (what they can do inside the Vault).
Access Levels
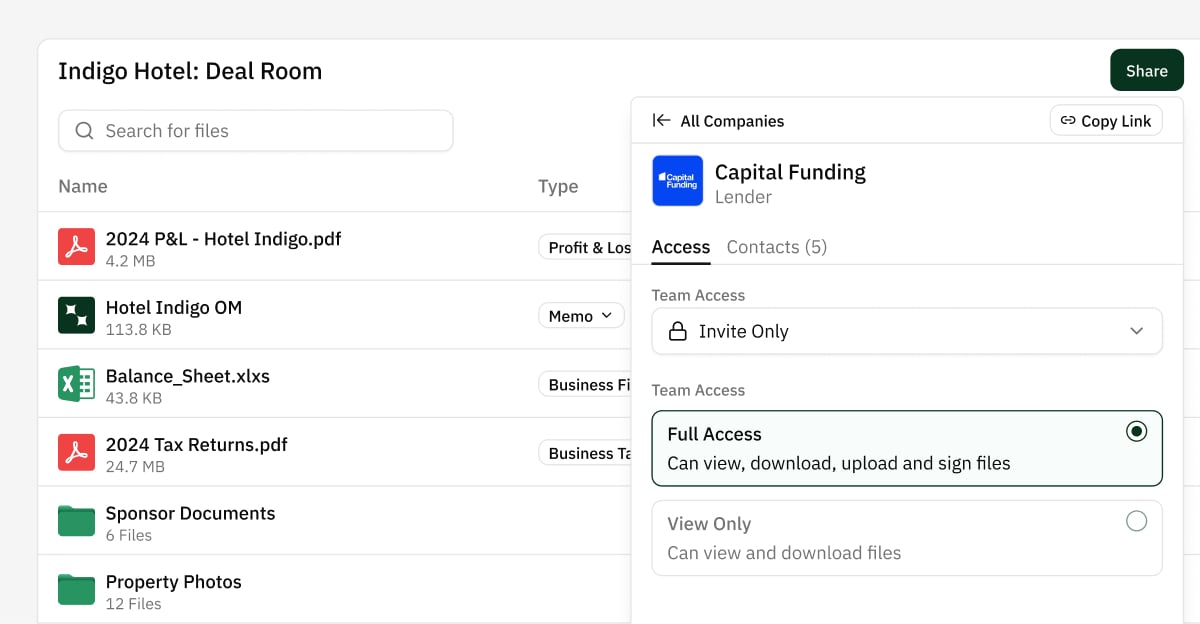
Access let's you configure who from the company can access the vault. "Anyone with the Link" (Public) is easiest for the people you are sharing with, and does not require the viewer to enter an email. For more restriction you can use "Anyone at Company" (which is based on email Domain) and "Invite Only" (In which you specify the specific emails who can access).
- Anyone with the Link (Public): No sign-in required; easiest for lenders.
- Anyone at Company: Restricts access to recipients with your company's email domain.
- Invite Only: Only specific email addresses you select can access the Vault.
For Invite-Only Vaults, Lev automatically invites the Primary Contact on the Placement during outreach.
Full Access vs. View Only
Permissions define what guests can do after they open a Vault.
- View Only (MVP): Guests can view and download files. This is the current default.
- Full Access (Future): Will allow guests to request files, upload documents, and perform other collaborative actions.
Currently Lev only offers View and Download capabilities for external guests in a Vault, but in the near future we will be giving them the ability to Upload, Comment, and Request files.
Managing Permissions per Lender
You can override default settings for specific lenders:
- Open the Vault and click Share or the gear icon to access settings
- View who currently has access (lenders with link access, individual permissions, team members)
- To change a specific lender's permissions, find them in the list, click the permission dropdown, and select the new level
- To revoke access entirely, click Revoke next to the lender, or disable the link
Additional Security Options
- Require email to access — Enable this to know exactly who is viewing your documents, capture contact info from new viewers, and control access more tightly
- Password protection — Add a password requirement for an extra layer of security
Best practices: Start with view-only and upgrade permissions as deals progress. Use the email gate for widely shared links. Revoke access after deals close or fall through. Review access lists periodically.